
News
DIY Wool Felted Easter Eggs for a Cozy Spring Décor
Apr
Springtime is here, and what better way to celebrate the season than with handmade wool felted Easter eggs? These delightful ornaments can bring a rustic, whimsical touch to your Easter celebrations. Wool felted eggs are not only charming but also eco-friendly, as they are made using natural materials. In this guide, we’ll take you through the process of creating your own wool felted Easter eggs, with easy-to-follow steps that will make your home ready for the holiday season.
Materials You’ll Need:
-
Core Wool: This is the base wool that will form the main structure of your egg. You can find core wool at craft stores or online.
-
Wool Roving: For adding decorative colors and patterns. Wool roving comes in a wide range of colors, including pastels, bright hues, and earthy tones.
-
Felting Needles: These special needles are used to poke the wool into shape and create a felted surface.
-
Egg Mold or Styrofoam Eggs: You can use a styrofoam egg as your base or make your own using the wool felting technique from scratch.
Step-by-Step Instructions:
-
Prepare the Base: Begin by wrapping core wool around the egg mold or styrofoam egg. Use your felting needle to start felting the wool into place. Make sure to cover the entire surface of the egg, ensuring a smooth and even coat. The core wool will form the solid foundation of your egg.
-
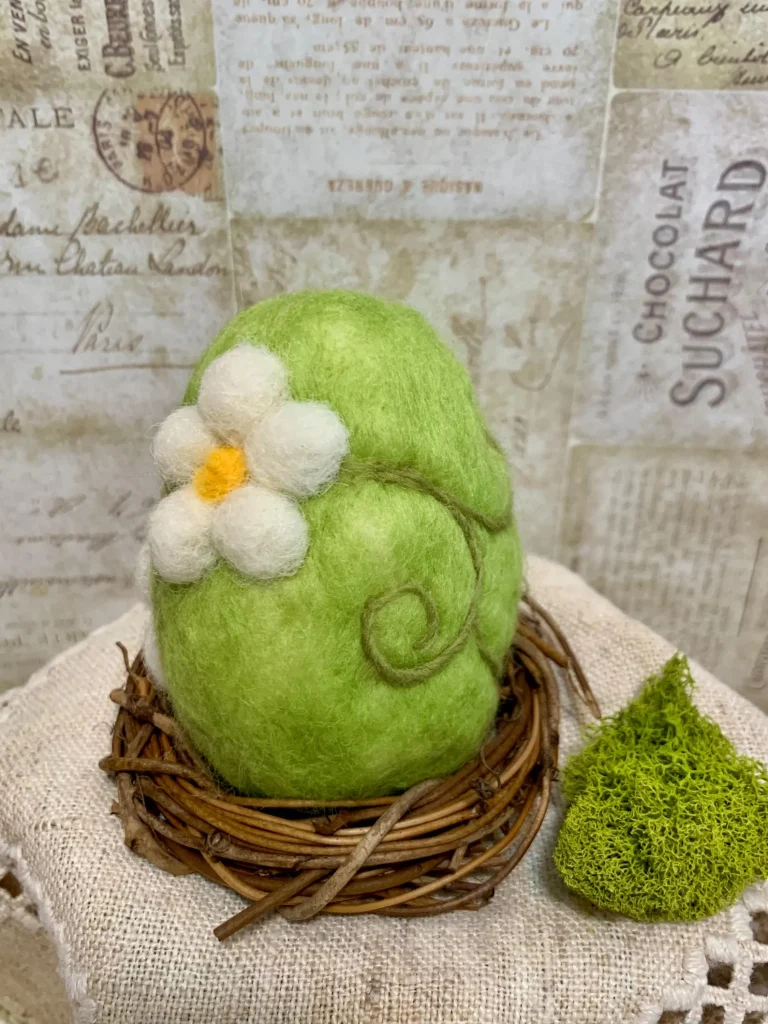
Add Decorative Layers: Once the base is complete, it’s time to add the fun part: the decorative layers! Take wool roving in your preferred color and gently pull it apart into thin strands. Lay these strands across the egg and use your felting needle to poke the wool into the base. This will secure the wool and create the design you want. You can create various patterns, such as stripes, dots, or even floral designs.
-
Finish the Design: Continue layering and felting the wool until you’re happy with the coverage and design. Use the needle to smooth out any rough edges and ensure the design is well-formed.
-
Secure the Shape: After completing the design, carefully smooth the egg with your hands to ensure it retains a round, egg-like shape. This step is important to get a finished look.
-
Optional Additions: If you want to add extra details like flowers, leaves, or tiny decorative elements, now is the time. Use additional wool roving in different colors and designs to create these accents. You can also incorporate other natural materials like dried flowers, ribbons, or small buttons for added flair.
-
Let It Dry: After finishing the egg, let it dry completely. If you’re using a wet felting method, you can rinse the egg in warm water with a mild detergent to help set the fibers. Allow the egg to air dry.
Why Handmade Wool Felted Easter Eggs Are Perfect for Spring Décor:
These eggs are a fantastic addition to any spring-themed décor. They’re perfect for Easter egg hunts, as well as springtime centerpieces and wreaths. You can use them to decorate your home, hang them on a wreath, or simply display them in a basket. Handmade wool felted eggs offer a unique, personal touch to your holiday décor, and they make wonderful gifts for family and friends.